Thursday, January 5, 2012

Notan


Notan is an arrangement of light and dark that creates an impression of beauty. Notan is a popular form of collage in Japan. Students focused on two art principles for this project- shape and space. Students were allowed to work with either realistic or abstract shapes when creating their collage. Notan collages are so unique and beautiful because they focus on a play of positive and negative space that create interesting shapes. We overlapped several different colors to create an even more dynamic and layered design.

Hungry Hungry Caterpillars


This lesson incorporated two of my favorite art books- The Dot by Peter Reynolds and The Hungry, Hungry Caterpillar by Eric Carle.


We began by reading The Dot. Students created the brightly colored backgrounds by using bingo stampers in different colors and then filling in the left over space with blue watercolor paint. I gave students the option of creating patterns with their dots or to just stamp randomly. I must say that the bingo stampers are one of the students favorite art tools!


On the second day, we read the story The Hungry, Hungry Caterpillar. The story follows the week of a very hungry caterpillar that eats his way through everything he can find. The author and artist, Eric Carle, creates the images in his books by collaging pieces of painted papers. We used his caterpillar as inspiration for our artworks. The circles of the caterpillar were made from green paper that had been stamped and brushstroked with different colors.


During the final class, we created the caterpillar face and finished it off with some stamped green grass. I played the short video of The Hungry, Hungry Caterpillar for the students too. The lesson turned out to be a great way to turn one of the students favorite books into an even more fun art adventure!

Thursday, December 8, 2011

Native Pottery


I used this lesson as an introduction to Native American pottery. We began by looking at the different styles of pottery made by Native Americans. It is important for students to understand that these usually serve a practical purpose such as storage. I gave the students lots of examples so they could see the different designs, patterns and symbols Native artists would use. After completing several sketches, student drew them out on manilla paper. The designs were outlined in black and then colored with markers. I had the students leave some of the pottery uncolored to keep that natural clay look. After the marker is complete, we used black and white chalk to create some very subtle highlights and shadows. This shading along with the placement on the black paper can create a very effective 3D effect. Once these were finished, we began creating some real clay pots!


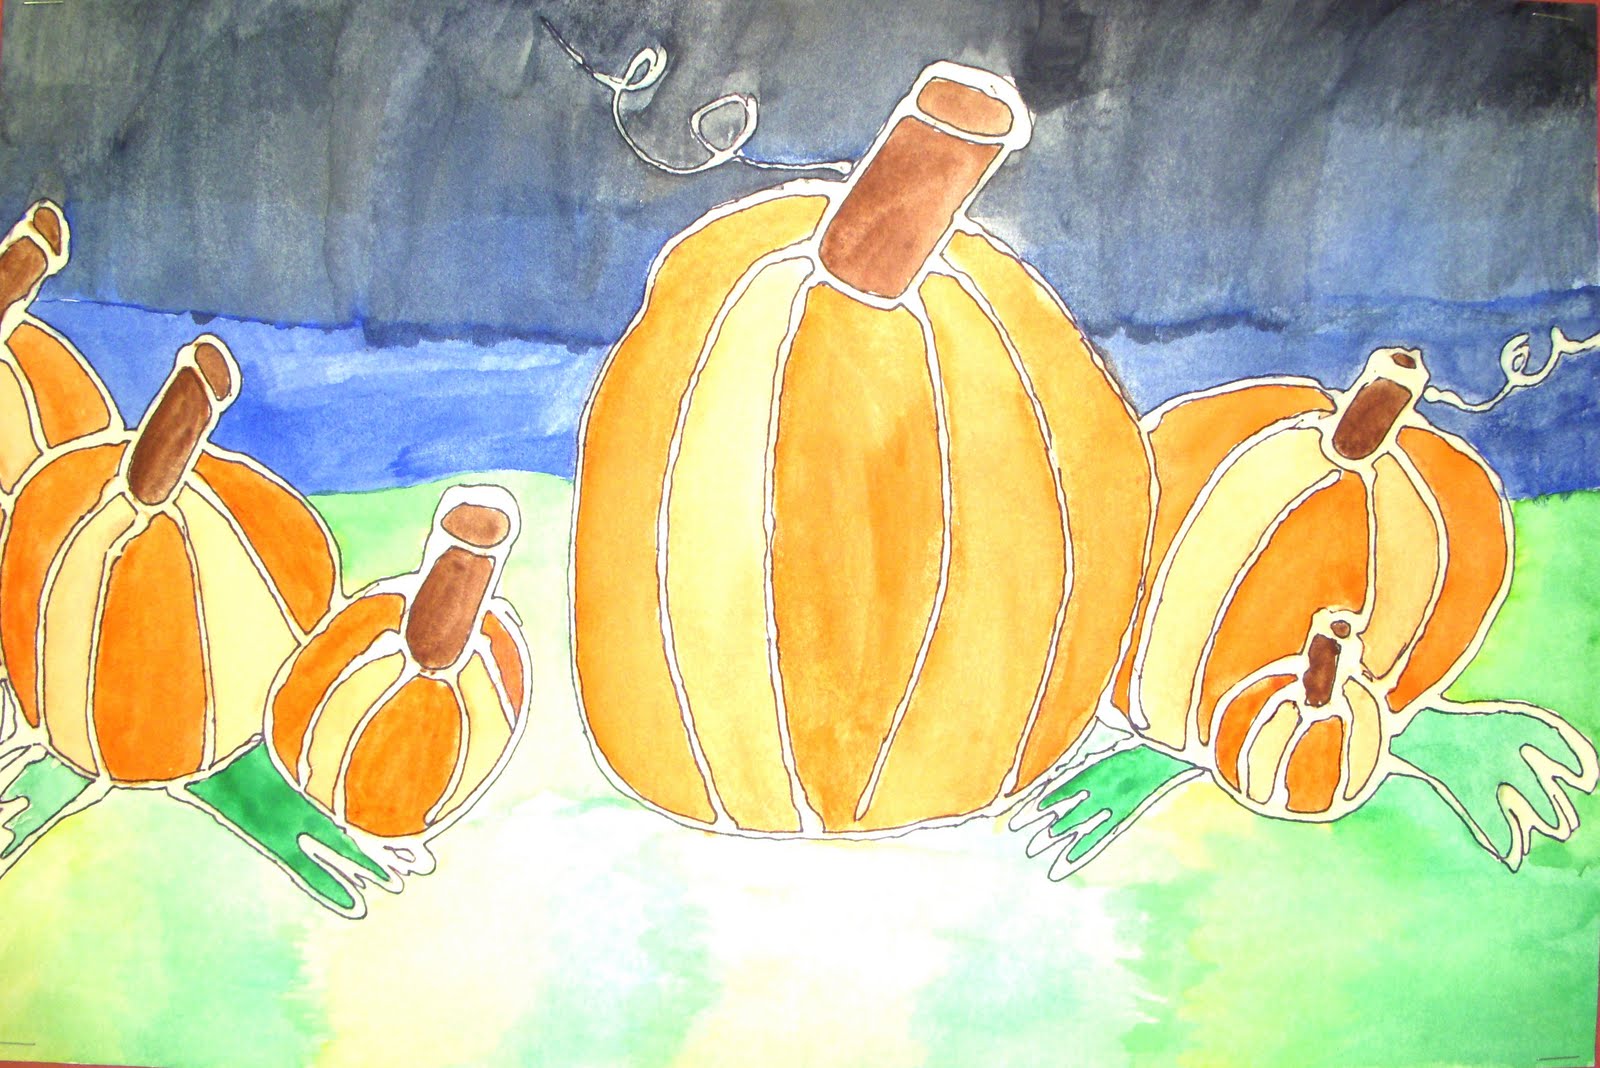
Glue Line Pumpkins


This is a great project for teaching wet-on-wet painting techniques, color blending, and how to use space in an artwork.


We began by doing sketches of real pumpkins. I prefer to use the mini pumpkins because they are cheaper and easier to move. I made sure students used contour lines while drawing and focused on details like vines and leaves. Once students were comfortable sketching the pumpkins, they then transferred that drawing onto a large piece of tagboard. The students had to be very comfortable with the drawing, because the large drawing had to be done with glue! I did not let the students use pencil because once the glue dries, it becomes clear and the pencil drawing would become visible. These were left to dry overnight. The next day, I had the students use an ultra fine sharpie and outline all of the glue lines. It can be very difficult, and sometimes you may need to tilt the paper to be able to see where the glue is. Finally we were ready to paint! I showed the students how to use a wet-on-wet technique to spread color quickly, as well as how to blend analogous colors. You have to be sure to NOT paint over the glue lines, the glue does not resist the paint and can be very hard to remove.


These painting were very fun to do and extremely successful! I recieved many compliments and they made for a great Autumn display!


These were the PreK and Kinders first project of the year. We began by creating a drawing using only the three primary colors. These were then put onto a larger sheet and we created a self portrait using basic shapes and lines. The final touch was a little yarn for hair and some fun stamps too!


Fall Leaves


Students in 4-6 created these amazing leaf designs. We started by experimenting with a few different watercolor techniques to blend warm colors. We later used this painting to create a variety of abstract leaf designs. Students then cut these out and were given the option of using some different patterned papers.

Friday, October 21, 2011

Pop Art Portraits


These self portraits take a lot of prep work and knowledge of photo editing, but the results are worth it!


Students began by having a photograph taken in class. We drew out grids over the photos, then a larger grid onto a large paper. The information on the photo was transferred to the paper square by square, creating a perfectly proportioned portrait. The students then applied their knowledge of value to paint in the face and hair. The final touch was adding some expressive drips and splattering. The results are amazing and show a modern twist on the pop art style portraits so popular many years ago.