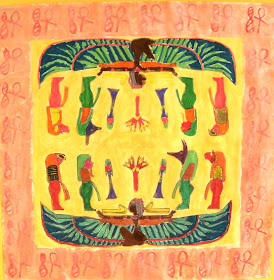
The first step in this lesson is to read about the art of Egypt and really examine the different characteristics and their use of symbols. I have the students draw out a design on a small sheet of paper, giving them the option of being realistic or more abstract. These designs are then transferred onto a larger paper four times creating a symmetrically balanced composition. I had the students color in the symbols and figures with marker, then the background was filled in with gold paint. We then created a border around the entire composition using styrofoam stamps of a heiroglyphic.
Monday, January 23, 2012
Egyptian Symmetry
The first step in this lesson is to read about the art of Egypt and really examine the different characteristics and their use of symbols. I have the students draw out a design on a small sheet of paper, giving them the option of being realistic or more abstract. These designs are then transferred onto a larger paper four times creating a symmetrically balanced composition. I had the students color in the symbols and figures with marker, then the background was filled in with gold paint. We then created a border around the entire composition using styrofoam stamps of a heiroglyphic.
Friday, January 20, 2012
African Sunsets
The 1st through 3rd grade classes recently completed this amazing silhouette project. We began with a lesson on color blending. We looked at the color wheel and discussed how colors could be blended if they are next to each other on the color wheel. We looked at a picture of a sunset and noticed the gradual color shift from yellow to orange to red. The students then painted using watercolors and tried to mimic this gradual color shift.
During the second class, students choose an animal to include in their drawing. Some of their options were zebras, giraffes, elephants and monkeys. We drew the animal over top of the painting and then painted the animal, ground and a tree in black. This gives the painting a great silhouette that really feels like the sun is setting in the background. I read the African folktale Anansi the Spider and told the students to focus on the pictures and designs in the story. We then created a similar design along one edge of the painting.
On the final day, we began by using a marker to clean up the edges of the black paint. Because the silhouette is so important, all the edges need to be very clear and smooth. We then created a native African figure and included it in the painting. We looked at some images from Masai natives and took note of the way they dressed, the types of jewelry they wore and their hair.
The final product is both visually stunning and a great introduction into the land of Africa!
Thursday, January 5, 2012
Notan
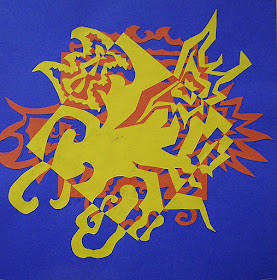
Notan is an arrangement of light and dark that creates an impression of beauty. Notan is a popular form of collage in Japan. Students focused on two art principles for this project- shape and space. Students were allowed to work with either realistic or abstract shapes when creating their collage. Notan collages are so unique and beautiful because they focus on a play of positive and negative space that create interesting shapes. We overlapped several different colors to create an even more dynamic and layered design.
Hungry Hungry Caterpillars
This lesson incorporated two of my favorite art books- The Dot by Peter Reynolds and The Hungry, Hungry Caterpillar by Eric Carle.
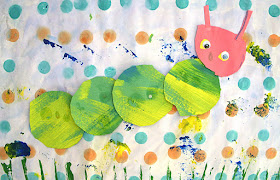
We began by reading The Dot. Students created the brightly colored backgrounds by using bingo stampers in different colors and then filling in the left over space with blue watercolor paint. I gave students the option of creating patterns with their dots or to just stamp randomly. I must say that the bingo stampers are one of the students favorite art tools!
On the second day, we read the story The Hungry, Hungry Caterpillar. The story follows the week of a very hungry caterpillar that eats his way through everything he can find. The author and artist, Eric Carle, creates the images in his books by collaging pieces of painted papers. We used his caterpillar as inspiration for our artworks. The circles of the caterpillar were made from green paper that had been stamped and brushstroked with different colors.
During the final class, we created the caterpillar face and finished it off with some stamped green grass. I played the short video of The Hungry, Hungry Caterpillar for the students too. The lesson turned out to be a great way to turn one of the students favorite books into an even more fun art adventure!